temporaryreality: (Default)
 Ever so long ago, I promised @sdi that I'd translate and post a recipe I obtained while living in Germany. There must be an equivalent term in English for "Rumtopf" but since I'm not much of an imbiber of alcohol, I don't know what it is - maybe a liqueur?

Without further ado (and with my comments in parentheses),

Großmutters Rumtopf

Ingredients: rum, fruit, sugar

The recipe collects fruit from spring through fall, with the additional ingredients, in a stoneware crock with a lid.

The following fruits are not suitable: apples, black currants, blueberries, blackberries (no reason given in the original).

Use only unblemished ripe fruit. One batch (original says “layer” – I’m not sure what’s intended, so went with “batch”. 10/30/23 comment: actually, I think layer is correct as you do add fruit layer by layer, apparently about 6 weeks apart) needs about six weeks to mature. Before refilling, stir with a clean spoon (this suggests that you can add fruit as you go along).

To prepare:

Rumtopf begins with the first summer fruit: strawberries.

Wash, drain (original says “dry”) and weigh strawberries and place in a bowl. Add half their weight in sugar. Let it sit for an hour and then add it to the stoneware crock (called “the rumpot”). Add enough rum (descriptions says it should be “54%” which I guess refers to the proof) so that the strawberries are covered to a fingerwidth. (Here begins the mixing metric and imperial measurements, which is amusing) So, you’ll need about .7 liters for every pound of fruit and half pound of sugar.

Close the crock and set in a cool place. Check periodically to confirm there is still enough liquid (always a fingerwidth above the fruit).

As soon as the next seasonal fruit is ripe, proceed as with the strawberries, but adding only about .2 liters of rum per pound of fruit.

Rumtopf calendar (obviously for the Northern Hemisphere)

 May/June:         .5 kg strawberries + .25 kg sugar + .75 liter rum

June/July:          1 kg unpitted sour cherries (pie cherries) + .5 kg sugar + .4 liter rum

July/Aug:            .5 kg each of apricots and peaches + .5 kg sugar + .4 liter rum.

Aug/Sep:            .5 kg plums (particularly Mirabelle – a yellow variety)+ .5 kg raspberries + .5 kg sugar + .4 liter rum

Sep/Oct:             .5 kg pear (peeled, cored, and sliced) + .25 kg sugar + .2 liter rum

Oct/Nov:            at the latest, four weeks after the last fruit has been added, add half a bottle of rum (no quantity given. How big is a bottle?)

 Let the Rumtopf sit for a few days.

 Nov/Dec:           Now you can enjoy the Rumtopf!


temporaryreality: (Default)
In response to  [personal profile] sdi 's inquiry, I am here to report on the fermenting of a small batch of sunchokes (aka Jerusalem artichokes).

I harvested in October when the north wind blew down my single stand of sunchokes before they'd even bloomed. Just to try out the variation, I peeled some and left others unpeeled, chopped them into about 1/2" long chunks, put them in a brine to ferment. Basically I followed this recipe: Jerusalem Artichoke Recipe (Pickled Sunchokes) | Hilda's Kitchen Blog. I changed the brine once, then at step 7 I stretched the instructions beyond their original intention, when the instructions say "once the sunchokes have been brined for a week..." 

I brined them for...four months.

Anyway, I pulled them out a few days ago and gave them a taste. They were sour and salty and generally uninspiring. They were not moldy or soft, and in fact they retained their crunch, though they were definitely on the starchy end of things, consistency-wise. At that point in the recipe, I wouldn't be too into them. Also, in my opinion, they definitely should be peeled. The outer layer was too fibrous for my liking.

I proceeded with the second part of the process (creating a vinegar and spice solution to pour over the 'chokes and let them sit in the fridge for ...[checks recipe]... haha, well, it says this: "The pickled sunchokes will be ready to eat after three days but will taste better the longer they’re allowed to pickle"...Well, I won't let them go another four months! 

Maybe another week?

Meigancai

Mar. 4th, 2021 07:52 pm
temporaryreality: (Default)


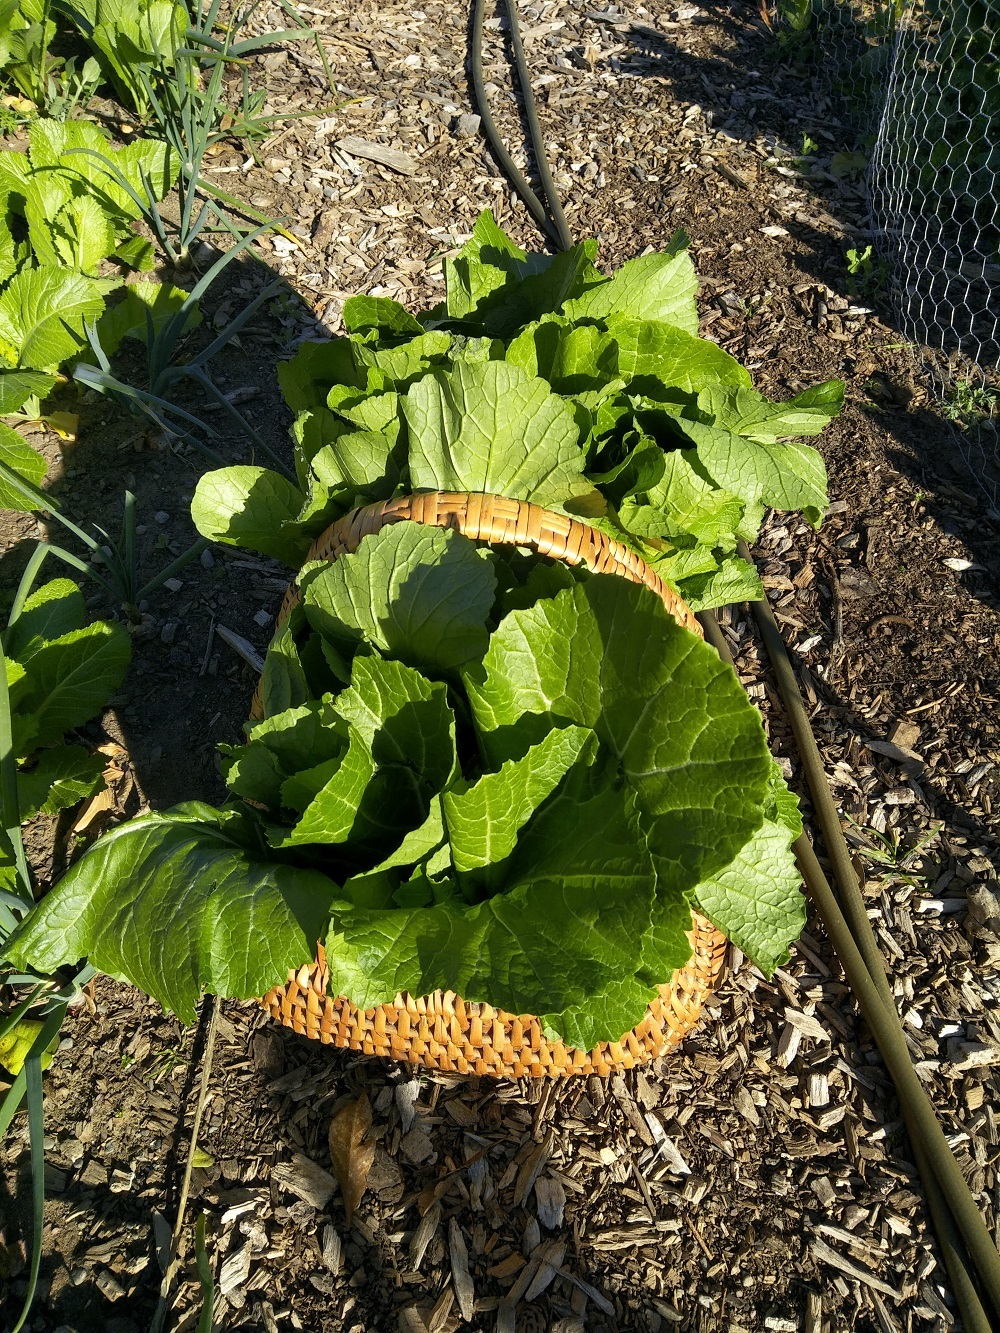
Should you find yourself with an abundance of greens (mustard, turnip, radish, napa cabbage, bok choy, broccoli greens) and wish for an easy way to preserve them, here's a nifty option: megancai.

Here's a basic rundown of the process. It is most definitely not regimented - the whole thing is flexible.

Harvest whole plants and thoroughly was the leaves. Make sure you wash out any dirt that gathered near the stem.

Hang the plants upside down, outside and in the sun. Perhaps indoors, in front of a sunny window would work too.


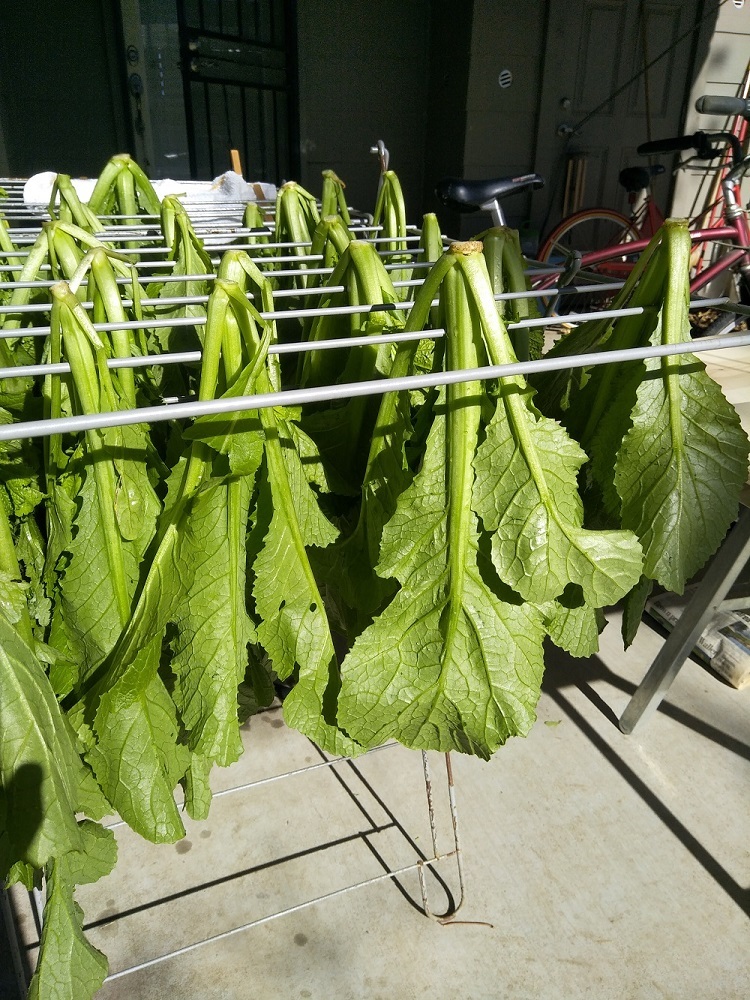
Depending on your ambient humidity, dry the plants for a day or two or three, until they lose a great part of their moisture. I hung mine on a coincidentally windy set of days and while the edges of some of the leaves got rather crisp, the limp stems still had some moisture.


Cut off the "gathered" end of the plant so that the leaves are loose. Grab a handful, place them in a mixing bowl and sprinkle some kosher or pickling salt on them (about 1-2 teaspoons or so).


Roll and crush the leaves with and into the salt - basically you're massaging the salt into them and as you work the leaves, the cells will breakdown, the salt will enter and liquid will seep out. You'll be amazed to see that a formerly shriveled and dry leaf of greens now looks juicy and dark with moisture. You should be able to squeeze some juice from each handful of leaves/stems and you may not use up all the salt. 


Knead each handful well, adding more salt when there isn't any more to rub into the greens as you add handfuls into the bowl. After each handful has been rubbed and rolled and kneaded well, set it aside.


When all the greens have been thus prepared, sprinkle a bit more salt on them for good measure, then pack them tightly into a pickling crock if you've got one. You could probably also use a canning jar. The batch I put into a canning jar molded, but that was probably due to not using enough salt more than the jar as a factor. The fermentation-crock batch did just fine. (You can also use a rubber stopper and a fermentation lock on a canning jar to keep air and organisms out. This isn't a particularly wet ferment so it's not possible to squeeze until the veggies are covered with brine).

Allow to ferment (without opening) for three weeks.

Remove the greens, set them on a drying rack and put them out in the sun for a day.


Bring them in and steam in a steamer (ideally a multi-level steamer so you can do them all at once) for fifteen minutes. Turn off the heat and let sit for about three hours (or overnight if that's how it works out). Then, remove them from the steamer, put them back on the drying rack and let them sit in the sun another day then steam them again the same way.

Complete this process a total of three times.

They will turn reddish and develop a deep and complex aroma.


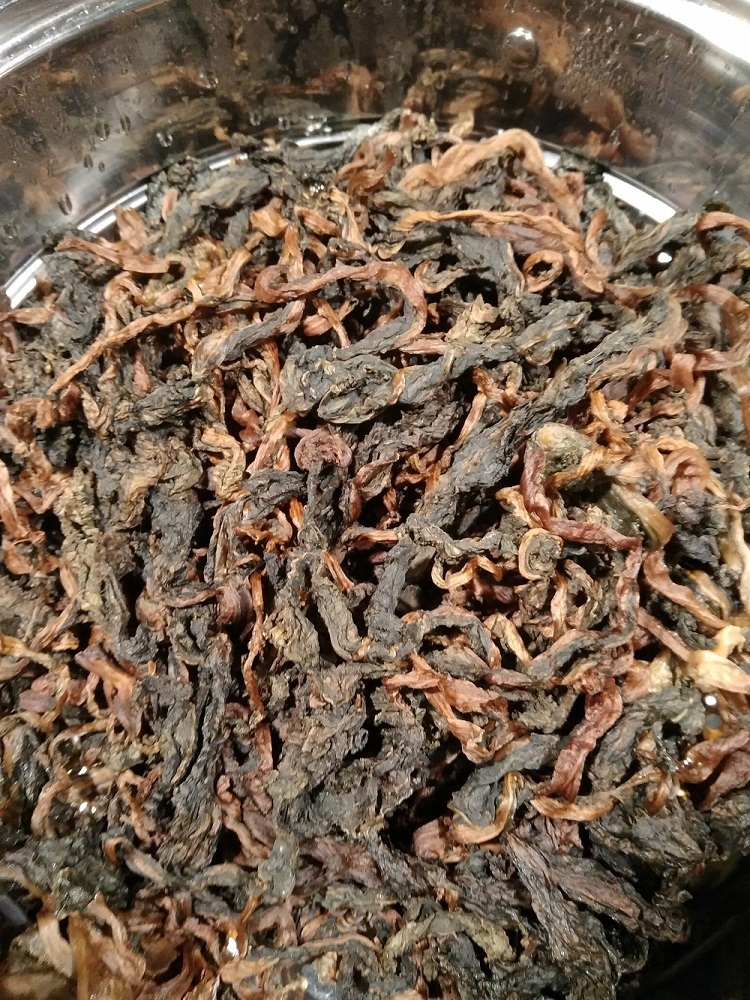
By the last steaming/sitting step, they'll be dark and pungent. They're storable at room temperature and can be stored a year or more (or so I've heard, I suppose you'll be smart enough to NOT eat any if you find mold is growing on them at that point).

Add them to stir fries - they're salty, so start slowly. Meigancai is great with tofu and with meat. It's traditionally an ingredient in braised pork dishes, but we've even put it in fried rice - it does need to be allowed to expand, so whatever you cook it with should have some liquid at some point in the cooking process, so I cook it with the veggies that'll go into the fried rice.

Nutritionally, this isn't going to be a main vegetable - it's too salty for that... and the steaming will have halted the fermentation process, so you won't be getting all the good bacteria. Still, it's a good way to preserve a harvest and expand the flavor options for dishes that you might be growing tired of. It might be good with beans or lentils (I've not tried it, but ?).


Oh, and if you decide the drying and steaming are too much effort, you can stop after the fermenting and end up with xuecai, which has its own salty/sour flavor and that can be added to a variety of savory dishes as well.

The main takeaway here is that these are versatile vegetables and they're really forgiving of experimentation even if you don't end up with these traditional Chinese preserves.

Here are some links to recipes and writing on meigancai

Salted Fish/Mei Cai Steamed Meat (咸鱼/梅菜蒸肉饼) - Guai Shu Shu (guaishushu1.com)
What to Eat in China: A Traveler's Guide | Serious Eats
Mei Cai Kou Rou (Steamed Pork Belly w/ Preserved Mustard Greens) | The Woks of Life


temporaryreality: (Default)
Speaking of "doing the right thing in your corner of the world," and continuing along from my earlier post, here are some of the plants with edible parts that I've planted in my front yard.

This is an extremly paltry list of plants that can double as food sources and ornamentals - I leaned heavily toward the medicinal and culinary herbs in this part of my yard, so edibles kind of got short shrift. What I have, though can be chalked up to the more drought and neglect tolerant of the edibles one might plant in a Mediterranean climate. I have a somewhat tough-love approach to gardening (which is why I'm, thus far, a vegetable gardener of middling ability. I tend to under-water and that consigns many of my plants to a hardscrabble existence) and that influences what survives and what thrives.

  • Pineapple Guava or Feijoa (Acca sellowiana) does really well on the central coast of CA, where I first encountered it. It seems to tolerate the heat of the Sacramento Valley, though it does appreciate adequate water to help it keep its fruit. It's got a spicy sweetness, slightly gritty flesh, and is almost never available commercially. I'm wondering how the dried sliced fruit would be added to other herbs for a tea. That may be the next experiment I undertake with fresh-from-the-garden produce. Fruit ripens in winter. In the spring, the pink and white, showy, flowers can be eaten. The petals are succulent and sweet.

  • Onions, garlic, shallots and jiu cai (Allium tuberosum), which is a Chinese variety we call garlic chives, the leaves of which are traditionally sautéed or added to dumpling filling - it's strongly flavored, but tasty. As these are all in the Allium family, it might be wise to not allow these to regrow every year in the same spot, so as to prevent the fungal problems that some alliums are prone to. Of course, with A. tuberosum being a perennial, I may just let them stay where they are. If I lived where it was colder and wetter, I'd plant Bärlauch or the North American analog, ramps.


  • Soaproot (Chlorogalum pomeridianum). This is a native plant, used widely throughout the region prior to European arrival, for a great number of things. The bulbs are covered in a "mat" of course hairs that can be made into brushes and the inner flesh of the bulb contains saponins and other compounds - the products that can be made or derived from the bulb include soap, glue, fish toxin (for stun-fishing), medicines, and, when well-roasted, food. I've seen mentions that young leaves are edible as well. I've not tried it (yet) but perhaps I will when I have more than just one plant. Given how prolifically it bloomed this year, and how many seeds set, I may have several next season. This plant is an evening bloomer that's beloved by carpenter bees and bumblebees - and it's the preferred overnight spot for the sweat bees and several species of small wasps who inhabit my garden. This article provides a good introduction to the plant: https://baynature.org/article/versatile-bulb-many-uses-soaproot/.
  • Goji (Lycium barbarum). Technically the variety I've planted is Himalayan or Tibetan Goji - there seems to be some confusion among suppliers in the US (intentional or accidentally, I can't tell) and they're conflating the two available Chinese boxthorns we call goji. Online, photos of one are often listed under the other's name, and since everyone's hopping on the superfoods bandwagon retailers are vague about what they're selling. I bought my starts from Baker Creek Heirlooms and only after I'd planted them and tasted the fruit did I go back and find they're not being sold under their Latin name and that they've been re-branded with the common name of "Scarlet goji berry." If you taste a ripe berry (or dry it and taste it) and it's not remotely palatable, you've probably got Lycium barbarum. If you taste a packaged (imported from China) goji berry, there's a pleasant sweetness that Lycium barbarum doesn't have. Even Plants for a Future mentions a "mild sweet licorice flavor" for L. barbarum. So, buyer beware - nobody seems to know what they're talking about. I frankly have no desire to consume the berries from my plants. In fact, I cut them down last year, thinking I'd not waste time or space on the "wrong" plant. Of course, plants are who they are, and this plant re-sprouts from any root pieces left behind. Not knowing that, I just chopped it off at soil level. Therefore, I still have L. barbarum. :)   Why do I add it to the edibles list if its berry flavor makes it inedible? Because you can actually eat the leaves! When it re-sprouted in spring I decided to give it another try and that's when I realized I'd overlooked the leaves' edibility. I admit, I've cultivated a fondness for bitter greens - something that's necessary if you're going to eat goji leaves. I found it enjoyable. I have not done much research into whether both varieties have been used medicinally in China, so can't claim L. barbarum is the same as L. chinense (or vice versa) in that regard. One last note - it's drylands "tolerant" but I can tell it'd be happier if I watered it more.
  • Olives (Olea europa spp.) I picked varieties (Arbosana and Arbequina) that are known for being dual purpose (oil and table olives). I tried brining some last year, but they were small, their pits were big, and the brine got moldy (typically that might not always stop me, but the olives were still tannic. I re-brined them, it still molded, I still have them... I might just toss them as we're approaching another harvest). I've not yet decided if or how I would process them for their oil. I have a romantic notion using it in an oil lamp on my altar. I don't think I'm quite there yet... that same daydream includes me learning basic pottery techniques to make oil lamps. But I'm also known for having a LOT of ideas and projects so... anyway, back to the edibility of olives... I have brined olives successfully in the past but they were Mission olives - the jury is still out on the Arbosana/Arbequina varieties (they pollinize each other so I planted one of each).

As I evaluate things and remove what doesn't work, I'll end up with more space. I'll try to add a few more "ornamental" edibles in the future.


Profile

temporaryreality: (Default)
temporaryreality

June 2024

S M T W T F S
       1
2345678
9101112131415
16171819202122
23242526272829
30      

Syndicate

RSS Atom

Most Popular Tags

Style Credit

Expand Cut Tags

No cut tags
Page generated Jan. 3rd, 2026 01:48 pm
Powered by Dreamwidth Studios